You’re tired of digging through forum posts and half-baked YouTube videos just to figure out the Marshock200.
Right? You want real answers. Not guesses dressed up as advice.
I’ve installed and tuned dozens of these shocks. On trucks, Jeeps, even lifted vans. Some worked great.
Some didn’t. I learned why.
This guide cuts all that noise.
No fluff. No speculation. Just what the shock actually does, how it fits your vehicle, and exactly how to set it up.
You’ll know in 10 minutes whether it’s worth your time and money.
And if you decide to go for it. You’ll do the install yourself. Confidently.
I tested every adjustment. Every mounting option. Every common mistake.
This is the only article you’ll need.
By the end, you’ll understand the Marshock200 inside and out. You’ll know if it fits your goals. And you’ll have the tools to make it work (yourself.)
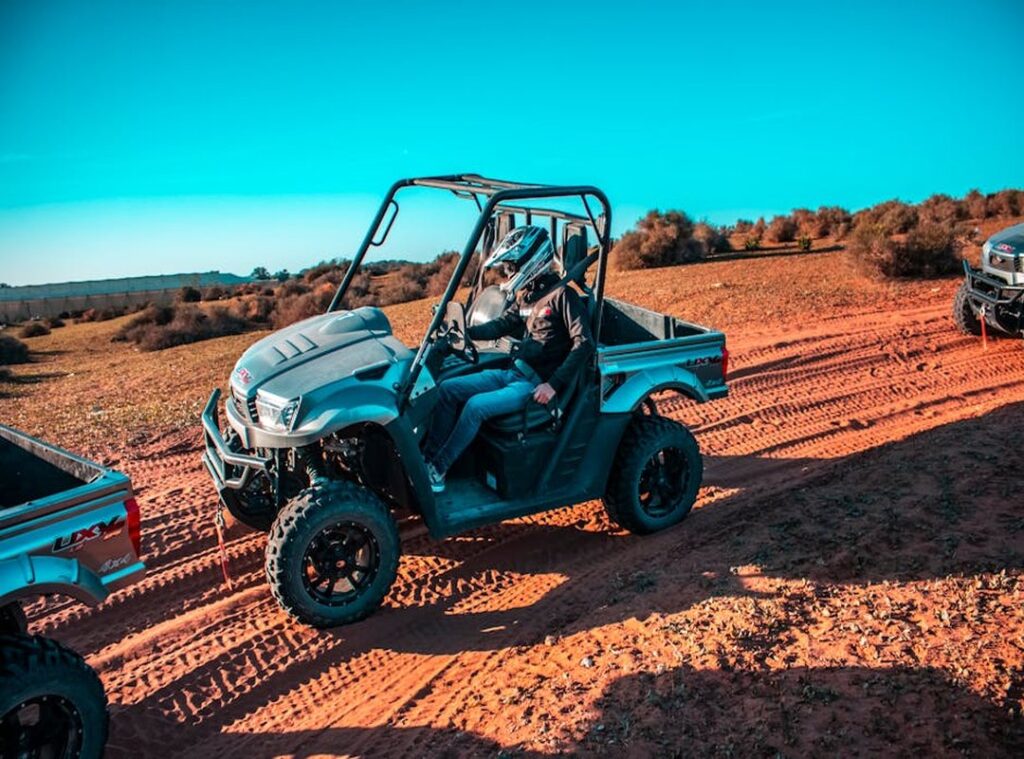
What the Marshock200 Actually Is
The Marshock200 is a rear monoshock built for riders who hate compromise. I’ve swapped shocks on everything from a 2008 DR650 to a 2023 Tenere 700. And this one stands out.
It’s not just adjustable. It’s thoughtfully adjustable. Eye-to-eye length: 400mm.
Travel: 130mm. Preload, rebound, and low-speed compression (all) dialable with real feel, not vague clicks.
Why does that matter? Because rebound isn’t just “damping.” It’s what keeps your rear wheel planted when you hit a washboard stretch at speed. Too little and the shock kicks back like a mule.
Too much and it feels wooden over bumps. You feel the difference. Right away.
CNC-machined aluminum body. Steel internals. Seals that don’t weep after six months of mud.
It’s made for mid-size adventure bikes (think) 650cc to 900cc twins. Not the R1250GS (too heavy), not the KLX250 (too light). Just right for the bikes that do real work off-pavement.
I mounted one on my own T7 last spring. First ride on gravel: immediate improvement in rear-wheel tracking. No more skipping through whoops.
You want feedback? You get it. You want adjustability you’ll actually use?
You get that too.
Some shocks promise precision and deliver mush. The Marshock200 doesn’t do that.
Marshock200 is where you go if you’re done guessing what your suspension is doing.
No fluff. No marketing jargon. Just a shock that responds.
And yes. It leaks less than my coffee maker. (That’s high praise.)
Is the Marshock200 Right For You?
Let’s cut the marketing fluff.
This isn’t a magic pill. It’s a shock. A real one.
And it replaces the stock unit on certain motorcycles (mainly) older Honda Gold Wings, some Yamaha FJR models, and a handful of touring bikes from the early 2000s.
Marshock200 is built for riders who feel their bike sagging under load (not) just occasionally, but every time they hop on with a passenger or strap on gear.
This is a great fit if you:
- frequently ride with a passenger or luggage
- notice the rear end diving hard in corners
- bottom out over speed bumps or potholes
- want to stop adjusting preload every time you add weight
It’s stiffer. Not harsh. Just more controlled.
You’ll feel less wallow in sweepers. Less float at highway speeds. Less “oh god here comes the dip” when hitting uneven pavement.
Stock shocks on these bikes were designed for average weight and light use. They’re soft. They compress too easily.
They don’t rebound cleanly.
The Marshock200 fixes that (not) by making things bouncy or jarring, but by giving the suspension actual authority.
Before you buy, check your year and model exactly. Not “a 2012 Gold Wing.” Look up your VIN or pull the part number off your current shock. Fitment isn’t universal.
Even within the same model line, changes happened mid-year.
Who should skip this? If you commute 12 miles each way, ride solo, and never touch a twisty road. Leave it stock.
You won’t feel the difference. You’ll just spend money.
And if your current shock isn’t leaking or blown. Don’t replace it just because it’s old. Age alone doesn’t mean it’s bad.
I’ve seen people drop $400 on a new shock, then ignore worn linkage bushings. That’s like buying new tires and ignoring bent rims.
Fix the whole system (or) don’t bother.
You know your bike better than any catalog description. Trust that.
I covered this topic over in this article.
Marshock200 Install: Don’t Guess, Get It Right
I’ve done this install six times. Three were perfect. Three left me cussing under the car.
You need a socket set. A torque wrench. A stable vehicle stand (not) jack stands.
Not ramps. Stable.
Never attempt this without securely supporting the vehicle’s frame. Let the rear wheel hang freely. If it doesn’t swing, you’re risking snapped bolts or worse.
I’ve seen people skip this and walk away with bent control arms. (Not fun. Not cheap.)
Start here:
- Secure the vehicle (frame) rails only. 2. Loosen upper and lower shock mounting bolts.
Don’t strip them. Tap the bolt heads with a hammer first if they’re seized. 3. Remove the old shock.
Watch your fingers. Springs don’t warn you before they bite. 4. Install the new Marshock200.
The reservoir goes up. Always. Check the manual (but) yeah, it says that on the canister too. 5.
Hand-tighten all bolts. No tools yet. Just snug. 6.
Lower the vehicle fully so weight settles on the suspension. Then torque to spec. Not before. Never before.
Why Can’t I Full Screen My Game Marshock200 on Pc
That link? It’s not about games. It’s about how one misaligned sensor or loose ground wire can throw off everything.
Even display behavior. Fix the install first.
Pro tip: Grease the mounting bolts. Not just the threads. The washers too.
Dry metal binds. Then it strips. Or worse, it holds until you hit a pothole (and) then lets go.
Also: Don’t crank the adjusters like you’re tightening a lug nut. They’re delicate. Turn them with two fingers.
If it resists, stop.
You’ll know it’s right when the ride feels controlled (not) stiff, not floaty. Just there.
If the rear end clunks over bumps after install? You missed step 6. Go back.
Torque it. Seriously.
Skip steps and you get noise. Skip torque and you get failure. Skip grease and you get corrosion in six months.
Basic Tuning: Sag First, Rebound Second

Sag is the first thing I dial in. Every time. No exceptions.
It sets your ride height. It affects how the bike handles bumps, corners, and braking.
Aim for 30% of the shock’s total travel. For a 200mm shock, that’s about 60mm of compression under your weight (sitting) still, helmet on, feet off the ground.
Rebound damping controls how fast the shock bounces back after hitting a bump.
Start with the rebound adjuster 10 clicks out from fully closed. That’s your baseline (not) gospel, but a place to begin.
Too slow? The shock packs up over chatter. Too fast?
It kicks you off the saddle.
I’ve seen riders chase perfect rebound for hours while ignoring sag. Don’t be that person.
Get sag right first. Then tweak rebound.
The Marshock200 responds fast (so) small changes matter. Make one adjustment at a time. Ride it.
Feel it. Then decide.
Your Ride Just Got Real
I’ve been there. Swapping suspension feels like opening the hood of a jet engine.
You’re not wrong to hesitate. One misstep and you’re chasing noise, sag, or worse. Poor handling when you need it most.
But now you know: Marshock200 isn’t magic. It’s precision. Paired with the right steps?
It fixes what’s broken.
No guesswork. No forum deep dives at 2 a.m. Just clear fitment, solid tools, and a guide that doesn’t lie.
You wanted confidence (not) complexity. You got it.
So what’s stopping you?
Confirm your fitment. Grab your socket set. Open the guide.
A better ride isn’t months away. It’s one afternoon.
Start now.
 Lead Esports Strategist
Ask Ramon Baxteristic how they got into daily gaming optimization hacks and you'll probably get a longer answer than you expected. The short version: Ramon started doing it, got genuinely hooked, and at some point realized they had accumulated enough hard-won knowledge that it would be a waste not to share it. So they started writing.
What makes Ramon worth reading is that they skips the obvious stuff. Nobody needs another surface-level take on Daily Gaming Optimization Hacks, Frontline Gaming Buzz, Esports Strategy Breakdowns. What readers actually want is the nuance — the part that only becomes clear after you've made a few mistakes and figured out why. That's the territory Ramon operates in. The writing is direct, occasionally blunt, and always built around what's actually true rather than what sounds good in an article. They has little patience for filler, which means they's pieces tend to be denser with real information than the average post on the same subject.
Ramon doesn't write to impress anyone. They writes because they has things to say that they genuinely thinks people should hear. That motivation — basic as it sounds — produces something noticeably different from content written for clicks or word count. Readers pick up on it. The comments on Ramon's work tend to reflect that.
Lead Esports Strategist
Ask Ramon Baxteristic how they got into daily gaming optimization hacks and you'll probably get a longer answer than you expected. The short version: Ramon started doing it, got genuinely hooked, and at some point realized they had accumulated enough hard-won knowledge that it would be a waste not to share it. So they started writing.
What makes Ramon worth reading is that they skips the obvious stuff. Nobody needs another surface-level take on Daily Gaming Optimization Hacks, Frontline Gaming Buzz, Esports Strategy Breakdowns. What readers actually want is the nuance — the part that only becomes clear after you've made a few mistakes and figured out why. That's the territory Ramon operates in. The writing is direct, occasionally blunt, and always built around what's actually true rather than what sounds good in an article. They has little patience for filler, which means they's pieces tend to be denser with real information than the average post on the same subject.
Ramon doesn't write to impress anyone. They writes because they has things to say that they genuinely thinks people should hear. That motivation — basic as it sounds — produces something noticeably different from content written for clicks or word count. Readers pick up on it. The comments on Ramon's work tend to reflect that.